Wednesday, August 21, 2013

How create and retrieve all 2D array data from Java propertie file in a Eclipse Project.

In this project I needed to have a 2D array. Which had the information about the items that I needed to be put in a combo box.
It can be easely done by creating a 2D array in the code. But hard coding that kind of information is not good programming practice therefore I decided to create a property file which had that information.
If the user want to change what is in the drop down meneu he can easily do it by changing the property file that is the advantage of having a property file.


How to add Property file 

In the package explorer, right-click on the package and select New -> File, then enter the filename including the ".properties" suffix.


How to create a 2D array in property file.

To do that you can use the following syntax.

ecf_providers=0,ECF Generic;1,r-OSGi;2,ecf.generic.server;3,ecf.filetransfer.bittorrent;\
4,ecf.msn.msnp;5,ecf.discovery.jslp;6,ecf.msn.msnp;7,ecf.xmpp.smack;


I have put  "\" at the end of the first line to make sure that all the array data will be retrieved when the the method in the code uses the property file otherwise only the first line will be read form the property file. Another way to do is write the array as a single line like this.

ecf_providers=0,ECF Generic;1,r-OSGi;2,ecf.generic.server;3,ecf.filetransfer.bittorrent;4,ecf.msn.msnp;5,ecf.discovery.jslp; 


Retrieve all 2D array data from Java properties file.

To get data from the property file and store it in a 2D array you can use the following two methods.

What this methods do is they one method read the data from the property file and the other method store that data in a array called Value_ecg_providers.


To read the data from the property file you can use a method like this.

    private static String[][] fetchArrayFromPropFile(String propertyName,
            Properties propFile) {
        String[] a = propFile.getProperty(propertyName).split(";");
        String[][] array = new String[a.length][a.length];
        for (int i = 0; i < a.length; i++) {
            array[i] = a[i].split(",");
        }
        return array;
    }


try {
            providers.load(RemoteServiceConsumerExample1Template.class
                    .getClassLoader().getResourceAsStream(
                            "providers.properties"));
            Value_ecg_providers = fetchArrayFromPropFile("ecf_providers",
                    providers);

        } catch (FileNotFoundException e) {
            System.out.print("Property file not found");
           
            e.printStackTrace();
        } catch (IOException e) {
            /
            e.printStackTrace();
        }

    } 

 Had to use the  <RemoteServiceConsumerExample1Template.class
                                    .getClassLoader().getResourceAsStream(
                            "providers.properties"))
>

 because I am loading the file from classpath.

If you need to load a properties file from the file system and retrieved the property value you can simple use something like this.


public class Test
{
    public static void main( String[] args )
    {
        Properties property = new Properties();

        try {
            //set the properties value

          
              property.setProperty("database", "localhost"); 
              property.setProperty("ABC", "CSE");        
              property.setProperty("letter ", "A");

            //save properties to project root folder
            prop.store(new FileOutputStream("config.properties"), null);

        } catch (IOException ex) {
            ex.printStackTrace();
        }
    }
}


Thursday, July 25, 2013

ECF Plug-in Development -Part 2


Before you can run an exiting ECF project you need to have set ECF in your target platform.In this case I am trying to run OSGi Remote Service Host Example .If you haven not set the ECF in the target platform for the workspace you will be getting some errors like this.Even though you will not see these errors until you try to run the example.


     org.eclipse.ecf.examples.remoteservices.hello,
     org.eclipse.ecf.osgi.services.distribution,
     org.eclipse.ecf.remoteservice

 Install the ECF SDK into Eclipse

Go to Help> Install New Software
In the new window click the the Add button on the right.
And type ECF for the name put the following url for the Location field.

 http://download.eclipse.org/rt/ecf/3.6.1/site.p2 


Select the Eclipse Communication Framework (ECF) check box. And click next.
And ECF SDK will be installed.

After that 
Goto Window>Preferences>Plugin Development>Target Platform.
And. ECF Remote Services to the active target platform.


WARNING: Port 9278 already in use. This instance of R-OSGi is running on port 9279


 If you get an error when trying run an OSGi example or a project way to resolve this is to use the disable R-OSGi when you start the eclipse.


 You can do it by using the following command.

./eclipse -vmargs -Dch.ethz.iks.r_osgi.registerDefaultChannel=false


You can learn more about ECF OSGi Remote Services from this link.


Tuesday, July 16, 2013

Useful software Ubuntu

System Load  Indicator


This will add the CPU, RAM, Network and HDD usage meters to the taskbar so user can quickly get an idea about the system.We can see more detailed information about the system as well from the system monitor window.

Add the repository by typing the following line in terminal
sudo add-apt-repository ppa:indicator-multiload/stable-daily
To update and to install run the following two commands.
sudo apt-get update
sudo apt-get install indicator-multiload

Or you can download it from the software center.


Xfburn-CD/DVD burning tool

This is useful for creating CDs and DVDs from files on your computer or ISO images downloaded from elsewhere.You can install it from software center or run the following command in the terminal.

sudo apt-get install xfburn


KSnapshot

KSnapshot is a simple applet for taking screenshots. It is capable of capturing images of either the whole desktop, or just a single window. The images can then be saved, or passed to another application using drag and drop.

sudo apt-get install ksnapshot


Saturday, June 29, 2013

Eclipse Plug-in Development


To develop Eclipse you need the Eclipse plug in development tools.There are two ways to get these tools.

1)You can download the Eclipse Classic which has the necessary tools.
         
      Download the suitable  Eclipse classic for your OS  from this link.
      And extract it.

2)You can update your existing Eclipse JAVA IDE.
  
      Go to Help=>Install New Software and select the site.In this case it is
      Helios - http://download.eclipse.org/releases/helios
      Then select General Purpose Tools. Under this category you will
      Eclipse plug-in Development Environment. Install it.


How to import an exiting Eclipse plug-in project.

Here I am going to import a plug-in  called  PDE template for creating a remote service.Which can be located here. I am entering the data which is suitable for this project.

Go to File=>Import=>General=>Exiting Project.Then Select the directory of the project.Click finish.


After this project is imported it showed some errors.These errors were occured due to some missing packages you can fix them by adding those packages.


You can easily add those packages by moving you mouse to the underlined area and selecting the option "add" from the drop down menu.


After adding those packages all the errors except one.


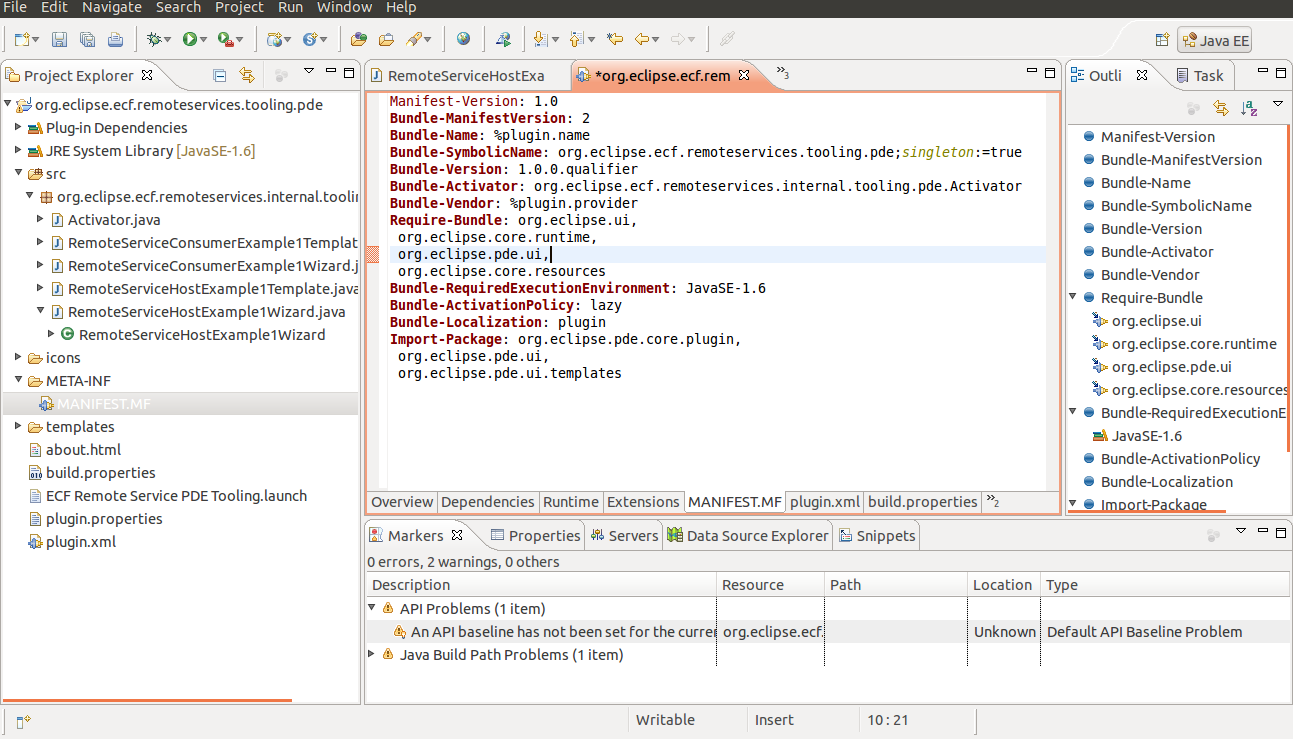
To fix this we need to edit the MANIFEST.MF file.
http://en.wikipedia.org/wiki/Manifest_file
Problem here is that the required version mentioned in the MANIFEST.MF file can not be found.There for I removed the specific bundle version line.So the plug-in will work with the default bundle version available.


     before editing
 
   after editing 

After editing you have to save the MANIFEST.MF file by pressing ctrl+s.
After this you can see that all the errors have gone.


How to Run a Eclipse Plug-in project

To test a Eclipse plug-in you have to run it as Eclipse Application.To that go to 
Run=>Run Configuration and select Eclipse Application.


To create a new configuration click the icon for creating a new configuration.
Then go the plug-in tab of the new configuration window and and select the plug-in you need to run in this case I am running "remote service" plug-in.


After that click run and you will see that new eclipse will launch will with the plug-in you developed.


Wednesday, June 26, 2013

Working with GitHub

How to install and configure  GitHub on Ubuntu


Installing  GitHub in ubuntu is very easy.
open terminal and run the following command.
sudo apt-get install git


How to configure GitHub

The first thing you should do when you install Git is to set your user name and e-mail address.To do that enter the following two lines in the terminal.

git config --global user.name "John Doe" # Sets the default name for git to use when you commit

git config --global user.email johndoe@example.com
# Sets the default email for git to use when you commit

to check your setting use the following command.
git config --list


Fork and Clone an Existing Repository

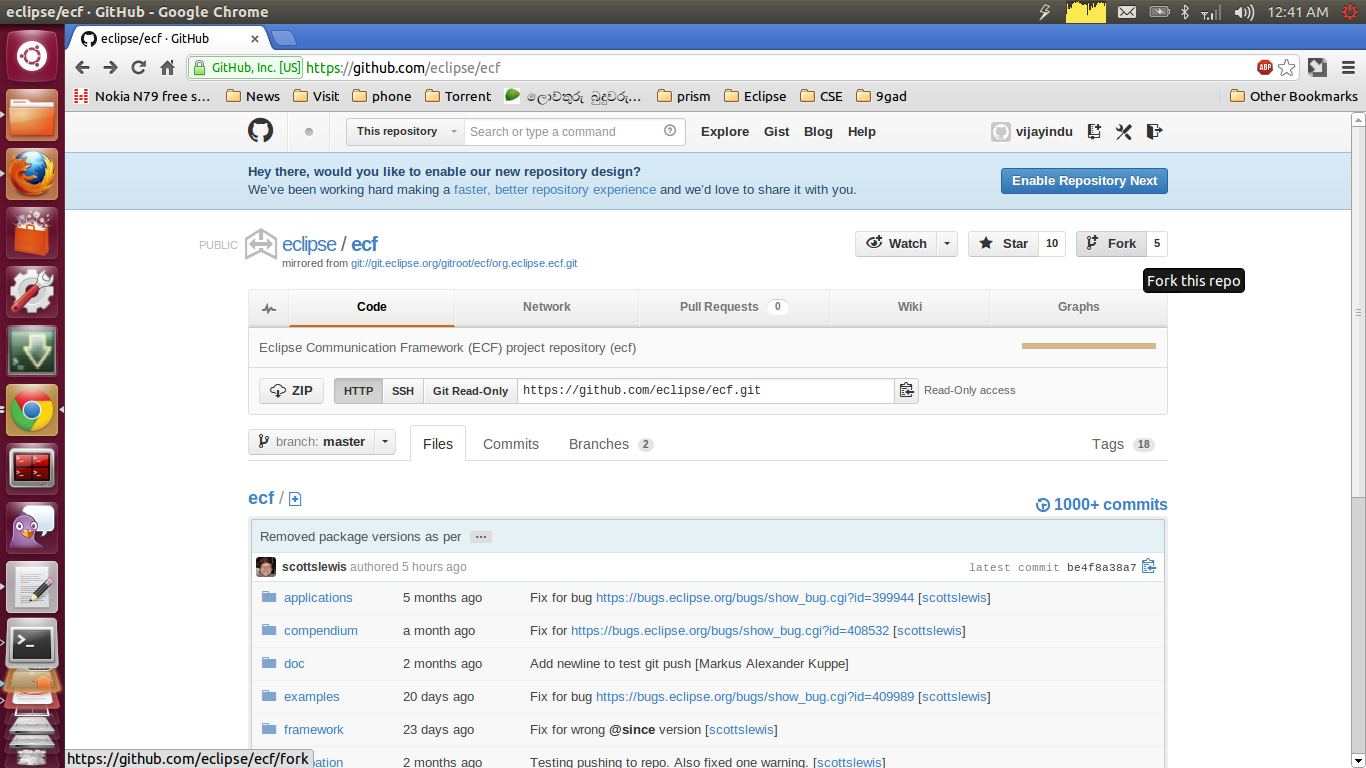
When you need work  on a project page that looks interesting  you can click the “fork” button in the project header to have GitHub copy that project to your user so you can push to it.
To fork a project, visit the project page (in this case,https://github.com/eclipse/ecf) and click
the “fork” button in the header. After a few seconds, you’re taken to your new project page, which indicates that this project is a fork of another one.

After you have fork the project,if you want to get a copy of an existing Git repository the command you need is git clone.

git clone https://github.com/vijayindu/ecf.git
#replace vijayindu with your user name.


this will clone the existing repository to your current working directory of your computer.


Tuesday, June 25, 2013

How to install Maven in Ubuntu

In a terminal(alt+ctrl+t)
type
apt-cache search maven
to get all the available Maven package.


To install maven type
sudo apt-get install maven
in terminal


Type
mvn -version
in your terminal to verify your installation.


You have successfully installed maven.


Install Eclipse,Java and setting variables in Ubuntu

To install Eclipse in Ubuntu first you have to download it from the Eclipse web site.
Here I am installing  Eclipse Juno (4.2)  Eclipse IDE for Java EE Developers Eclipse Juno (4.2)

You can download it from here.


After downloading the file you can you can open it with archive manger and and extract it where you want.


After that you can start using eclipse.

How To Install JDK On Ubuntu

Open terminal by pressing alt+ctrl+t .
Type
apt-cache search openjdk
To search all the available Openjdk version.


Here I am going to install open JDK 7

Type 
sudo apt-get install openjdk-7-jdk
in terminal to install open JDK 7

To verify the installation type
java -version
in terminal


How to set JAVA_HOME for OpenJDK


Type
nano ~/.bashrc
in the terminal to open the .bashrc and edit it.At the end of the file add the following line
export JAVA_HOME=/usr/lib/jvm/java-7-openjdk-amd64/


and press ctrl+o and then press enter to save the file.


To verify the java home type
echo $JAVA_HOME

in the terminal